
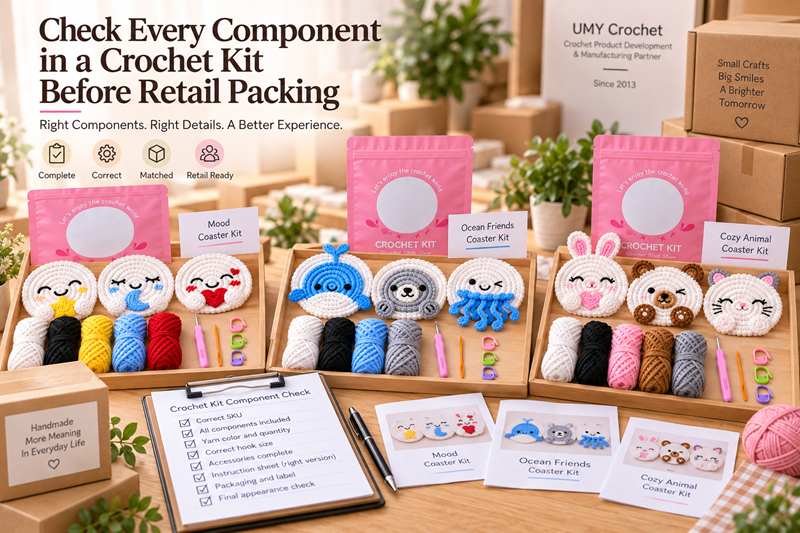
A crochet kit should not be approved for retail packing simply because all of its components appear to be present.
Before a kit is sealed, buyers and manufacturers need to confirm four things: the correct components are included, each component matches the approved specification, quantities are complete, and the components work together as one usable kit.
For a typical crochet kit, this means checking more than yarn and a crochet hook. Depending on the product, the inspection may cover yarn colors and quantities, hook size, stuffing, needles, stitch markers, eyes or other accessories, printed instructions, QR or tutorial information, labels, inserts, and packaging materials.
The most reliable approach is to create an approved kit BOM (Bill of Materials) and component reference before mass assembly. Each packing station can then check the actual contents against that reference before the retail package is closed.
For buyers, this matters because a kit can contain individually acceptable components and still fail as a retail product. One missing needle, the wrong hook size, insufficient yarn, or instructions for the wrong version can prevent the customer from completing the project.
This guide explains how to build a practical pre-packing component check for commercial crochet kits.
Why Crochet Kit QC Is Different From Finished-Product QC
A finished crochet toy is normally inspected as one completed product.
A crochet kit is different.
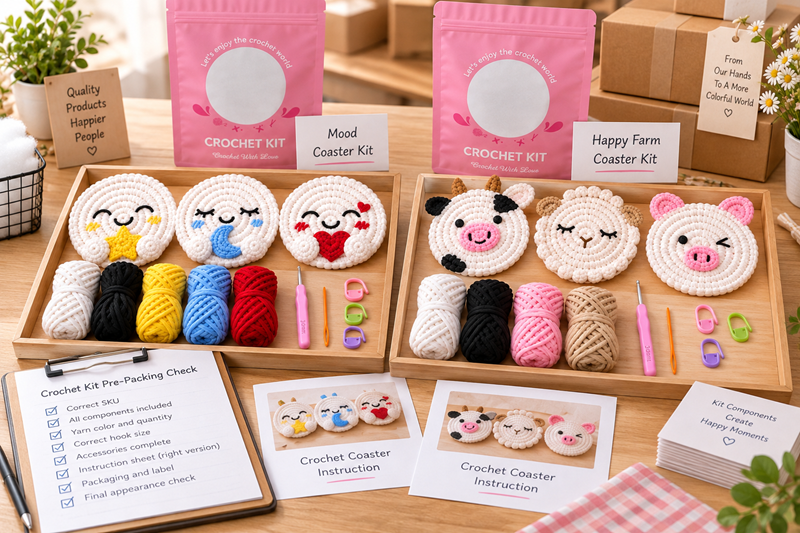
It is a multi-component product system. Its retail performance depends not only on the quality of each item but also on whether all items correspond to one another.
A kit might include:
- Yarn in several colors
- Crochet hook
- Stuffing
- Yarn or tapestry needle
- Stitch markers
- Safety eyes or other components
- Embroidery materials
- Printed instructions
- Tutorial or QR information
- Labels and warning information where applicable
- Inner bags or component organizers
- Retail box, pouch, or outer packaging
This creates several possible failure modes.
The yarn may be correct, but the hook may be wrong.
The physical materials may be correct, but the instruction sheet may belong to another SKU.
Every item may be present, but the yarn quantity may not be sufficient for the intended project.
Or the kit may be functionally correct while the outer package carries the wrong variant information.
That is why kit inspection should answer three separate questions:
| QC Question | What It Checks |
|---|---|
| Is every required component present? | Completeness |
| Is each component the correct version? | Specification accuracy |
| Do all components work together for this SKU? | Kit-level compatibility |
A useful pre-packing system checks all three.
1. Start With an Approved Kit BOM
The first control document should be the kit's approved Bill of Materials.
A BOM turns a general description such as "complete beginner crochet kit" into a component-by-component packing specification.
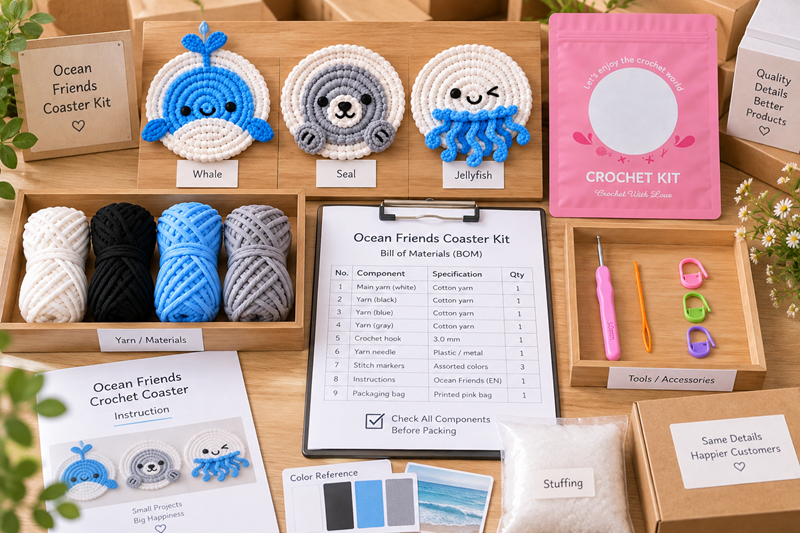
A practical BOM can include:
| Component | Specification to Record | Quantity |
|---|---|---|
| Main yarn | Fiber/type, color reference, required amount | By SKU |
| Contrast yarn | Color reference and amount | By SKU |
| Crochet hook | Approved size | 1 |
| Stuffing | Material and pack quantity | 1 |
| Needle | Approved type/size | 1 or as specified |
| Stitch markers | Approved type/color | As specified |
| Eyes/accessories | Size, color, type | As specified |
| Instructions | Correct SKU/version/language | 1 |
| Tutorial reference | Correct link or QR version | 1 if used |
| Inner packaging | Approved bag/organizer | As specified |
| Retail packaging | Correct artwork/version | 1 |
The exact fields depend on the kit.
What matters is that the packing team does not have to decide from memory what belongs inside.
Give Similar Components Clear References
This is especially important when several kits share similar materials.
For example, two SKUs may both use:
- White yarn
- Black yarn
- A crochet hook
- Stuffing
- A needle
But they may require different yarn quantities or hook sizes.
A component that looks similar is not necessarily interchangeable.
The BOM should therefore identify components precisely enough to prevent substitutions based only on appearance.
2. Create an Approved Physical Reference Kit
Documents are useful, but a physical reference can make assembly much clearer.
Before mass packing begins, prepare an approved kit showing:
- Every required component
- Correct quantities
- Correct component arrangement
- Correct printed materials
- Correct packaging
- Final packed appearance
The reference kit should correspond to the approved production version.
It can be used at the packing station together with the BOM.
This gives operators two forms of comparison:
Written specification + physical reference
For handmade and multi-component products, that combination can reduce ambiguity.
3. Check Yarn by Color, Type, and Required Quantity
Yarn is usually one of the most important kit components because the customer cannot finish the project without enough of the correct material.
Do not check yarn only by asking:
Is there yarn in the package?
Instead, check:
Correct Yarn Type
Confirm that the material corresponds to the approved kit specification.
Correct Colors
Compare yarn against the approved references, especially when several shades are visually close.
Correct Number of Yarn Units
If the kit requires several skeins, balls, bundles, or pre-measured portions, verify that the correct number is included.
Required Amount
The kit should contain the amount established for the project specification, including any production allowance defined during development.
This is particularly important when yarn is divided into smaller kit-specific portions.
Correct Allocation Between Similar SKUs
If several kits use overlapping palettes, the packing process should prevent yarn intended for SKU A from entering SKU B.
Color-coded bins, SKU-specific trays, or separated packing stations can help reduce mixing risk.
4. Verify the Crochet Hook Against the Pattern
A hook should not be treated as a generic accessory.
The hook size should correspond to the approved pattern and yarn combination.
Before packing, verify:
- Hook size
- Hook type if specified
- Quantity
- Physical condition
- Any required marking or identification
If several kits use different hook sizes, visually similar hooks should be separated clearly during assembly.
A simple control is to include the required hook size directly on the packing checklist rather than writing only "1 crochet hook."
For example:
Better: 1 × approved 3.0 mm crochet hook
Less useful: 1 × crochet hook
The more specific instruction is easier to verify.
5. Inspect Small Accessories Individually
Small components create disproportionate risk because they are easy to overlook during fast packing.
Depending on the kit, these may include:
- Yarn needle
- Stitch markers
- Safety eyes
- Noses
- Buttons
- Embroidery thread
- Keychain hardware
- Bells or other components only when specified
- Decorative accessories required by the approved design
Each item should be checked against the BOM for both type and quantity.
If a kit requires two eyes, finding an accessory bag inside the package is not enough. The contents of that bag must correspond to the approved specification.
Use Sub-Packs Where Appropriate
Very small parts may be easier to control when grouped into a defined accessory pack.
For example:
Accessory Pack A
- 2 × specified eyes
- 1 × needle
- 3 × stitch markers
The complete sub-pack can then become one controlled assembly item.
This does not eliminate the need to verify its contents, but it can simplify final kit assembly.
6. Check Stuffing and Other Consumable Materials
Stuffing is another component that can be present but insufficient.
The packing specification should define how it is controlled—for example, by approved pack format, weight, or another practical production reference.
The same principle applies to other consumable materials.
A component check should ask:
- Is it present?
- Is it the approved material?
- Is the intended quantity included?
- Is it clean and appropriately packed?
- Can it be confused with material from another SKU?
For retail kits, cleanliness and containment also matter because loose fibers or poorly packed consumables can affect presentation when the customer opens the box.
7. Match the Instructions to the Exact Kit Version
Printed instructions deserve the same attention as physical components.
A perfectly packed kit with the wrong instructions is still an incorrect kit.
Before packing, verify:
- Product/SKU
- Pattern version
- Language
- Page sequence
- Print completeness
- Legibility
- Any component references in the instructions
- Any linked tutorial information
Version control becomes especially important after product revisions.
Suppose the development team changes:
- Hook size
- Yarn quantity
- Construction sequence
- Accessory size
- Assembly method
The old instruction sheet should not remain available at the packing station after the revised version is approved.
This is a document-control issue, not simply a printing issue.
8. Test QR Codes and Digital Tutorial References
If the kit includes a QR code or another digital tutorial reference, do not assume that correct printing means the customer journey works.
The link should be checked before production approval and monitored as appropriate for the program.
Verify that the code:
- Can be scanned
- Resolves to the intended destination
- Corresponds to the correct product
- Uses the intended language or market version where relevant
- Does not point to an obsolete development page
A QR code can look perfect and still be functionally wrong.
For that reason, digital references should be treated as functional kit components.
9. Confirm Instructions and Physical Components Agree
This is one of the most valuable checks in the entire process.
Do not inspect the component list and instruction sheet independently and assume they match.
Compare them.
If the instructions say:
- Use the 3.0 mm hook
- Attach two eyes
- Use four yarn colors
- Finish with a specific accessory
then the physical kit should contain the corresponding approved items.
This cross-check helps identify errors that a simple presence/absence inspection may miss.
10. Separate Component QC From Final Kit Completeness
A useful QC system has more than one checkpoint.
Component-Level QC
Before assembly, check incoming or prepared components for:
- Correct specification
- Appearance
- Quantity
- Condition
- Version
Assembly Control
During packing, verify that the correct components are selected for the correct SKU.
Final Kit Completeness Check
Before the retail package is sealed, confirm that the assembled kit contains everything required.
These controls address different risks.
If quality control happens only after everything is packed, errors may be harder and more expensive to correct.
11. Use a Packing Checklist at the Assembly Station
The checklist should be short enough to use repeatedly but specific enough to prevent guessing.
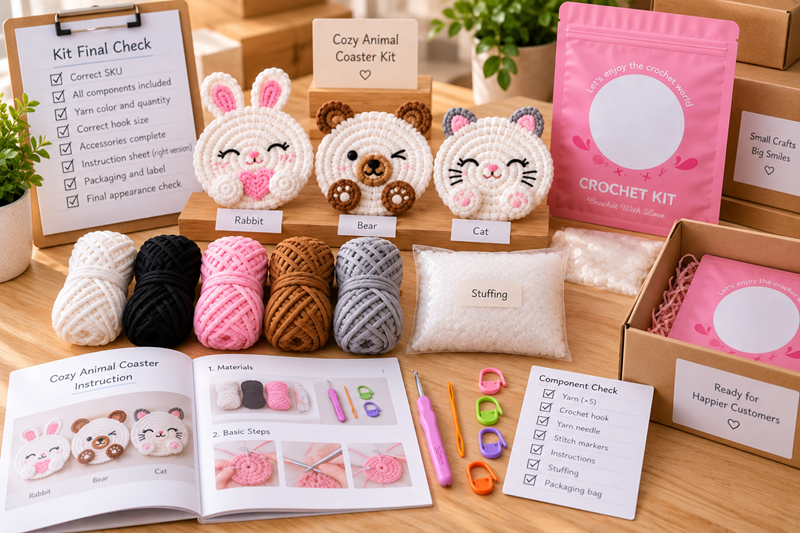
A simplified station checklist might look like this:
Crochet Kit Pre-Packing Checklist
- [ ] Correct SKU confirmed
- [ ] Main yarn correct
- [ ] Contrast yarn/color set correct
- [ ] Yarn quantity complete
- [ ] Correct crochet hook size included
- [ ] Stuffing included
- [ ] Needle included
- [ ] Stitch markers included if specified
- [ ] Eyes/accessories correct and complete
- [ ] Correct instruction version included
- [ ] Correct language version included
- [ ] QR/tutorial reference correct if applicable
- [ ] Inner component packaging correct
- [ ] Components visually clean and undamaged
- [ ] Contents match approved reference kit
- [ ] Outer packaging corresponds to the same SKU
For kits with many small components, the checklist may need additional item-level detail.
12. Prevent SKU Mixing During Packing
For example, a collection may contain:
- Animal Kit A
- Animal Kit B
- Animal Kit C
The products may share several yarn colors, the same stuffing, and similar accessories.
To reduce mixing, manufacturers can organize packing by:
- Dedicated SKU work areas
- Clearly identified component bins
- One active SKU per station where practical
- Approved sample displayed at the station
- Version-controlled packing sheets
- Completed-kit separation before carton packing
The objective is to make the correct action easy and the wrong combination obvious.
13. Check the Retail Package Against the Contents
The outer package is part of the product system.
Before sealing, verify that packaging corresponds to the contents inside.
Check relevant details such as:
- Product name
- SKU or internal reference
- Variant
- Language
- Component list
- Instructions or claims printed on the package
- Required labels for the intended product and market
- Barcode or retail identification where applicable
Specific labeling and compliance requirements depend on the product classification, intended age group, market, materials, and jurisdiction. Buyers should confirm the requirements that apply to their particular product rather than using a generic checklist as a substitute for market-specific compliance review.
This article focuses on operational component control, not legal certification.
14. Use Sampling to Validate the Packing System
Before full-scale retail packing begins, assemble a small number of complete kits using the intended production process.
Then open and inspect them as a customer would.
Ask:
- Are all components present?
- Are the quantities practical?
- Do the instructions match the contents?
- Is the correct hook included?
- Can small parts be found easily?
- Are materials organized logically?
- Does the tutorial reference work?
- Does the package accurately describe the contents?
- Can the project reasonably be started with what is provided?
- Is anything likely to be accidentally omitted during mass packing?
This is effectively a test of the packing system, not just the product.
Problems discovered here can be corrected before thousands of kits are assembled.
15. Define What Happens When a Kit Fails the Check
A checklist is useful only if failures have a clear response.
If a kit is found with:
- Missing component
- Incorrect yarn
- Wrong hook
- Incorrect accessory
- Wrong instructions
- Damaged component
- Packaging mismatch
it should be separated from approved stock and corrected according to the project's QC procedure.
The team should also determine whether the problem is isolated or indicates a wider packing issue.
For example, one kit with the wrong hook may justify checking other kits packed from the same component batch or during the same assembly period.
The purpose is not merely to repair one unit.
It is to understand whether the packing process allowed the error to repeat.
A Practical Crochet Kit Component Control Matrix
| Component | Presence Check | Specification Check | Quantity Check | Functional/Version Check |
|---|---|---|---|---|
| Yarn | ✓ | ✓ | ✓ | ✓ |
| Crochet hook | ✓ | ✓ | ✓ | ✓ |
| Stuffing | ✓ | ✓ | ✓ | — |
| Needle | ✓ | ✓ | ✓ | — |
| Stitch markers | ✓ | ✓ | ✓ | — |
| Eyes/accessories | ✓ | ✓ | ✓ | ✓ |
| Printed instructions | ✓ | ✓ | ✓ | ✓ |
| QR/tutorial | ✓ | ✓ | — | ✓ |
| Inner packaging | ✓ | ✓ | ✓ | — |
| Retail packaging | ✓ | ✓ | ✓ | ✓ |
The exact matrix should be adapted to the product rather than copied mechanically.
Common Crochet Kit Packing Mistakes
Several problems are particularly worth designing controls around.
Counting Packages Instead of Contents
An accessory bag is present, but one component inside is missing.
Checking Color but Not Quantity
The correct yarn shades are included, but there is not enough material.
Treating Hooks as Interchangeable
A visually similar hook is packed even though its size does not match the approved pattern.
Using Obsolete Instructions
Physical components have been revised, but an earlier instruction version remains in production.
Mixing Similar SKUs
Components from two closely related kits are accidentally combined.
Checking Components but Not Compatibility
Every item passes inspection independently, but the contents do not correspond to the instructions.
Leaving Packaging Verification Until the End
Correct kits are inserted into the wrong printed retail packaging.
Good QC is designed around preventing these predictable errors.
What Buyers Should Approve Before Mass Retail Packing
Before the packing line starts, buyers should ideally have clarity on:
- Final kit BOM
- Approved physical kit sample
- Yarn specifications and references
- Component quantities
- Hook specification
- Accessory specifications
- Final instruction version
- Final tutorial/QR destination if used
- Inner packing method
- Final retail packaging
- SKU identification
- Packing checklist
- QC checkpoints
- Handling process for non-conforming kits
This creates a much stronger reference than approving only the outer package artwork.
How UMY Approaches Crochet Kit Development and Packing Readiness
For custom crochet programs, UMY's role can extend beyond manufacturing an individual crocheted item.
A retail kit may require coordination between:
- Crochet product development
- Yarn and material selection
- Component planning
- Sample development
- Instruction-related component alignment
- Packaging development
- Production
- Quality control
- Final packing preparation
The important principle is to treat the kit as one integrated retail product.
Questions Buyers Can Send a Crochet Kit Supplier
Before approving retail packing, consider asking:
- What document controls the components included in each SKU?
- Is there an approved physical reference kit at the packing station?
- How are similar yarn colors and hook sizes separated?
- How are small accessories counted?
- How are instruction versions controlled?
- How are different language versions separated?
- How are QR or tutorial references checked?
- At what stage is final kit completeness verified?
- How are failed kits isolated and corrected?
- How is SKU mixing prevented during multi-product packing?
The answers can reveal whether kit assembly is being managed as a controlled process or simply as manual packing.
Frequently Asked Questions
What should be checked before a crochet kit is packed for retail?
Check the approved SKU, yarn type and colors, yarn quantity, crochet hook, stuffing, needle, stitch markers, eyes or accessories, instructions, tutorial references, inner packaging, and retail packaging. The exact checklist should follow the approved BOM for that kit.
Why does a crochet kit need a BOM?
A BOM defines exactly which components and quantities belong to a particular SKU. It gives purchasing, production, QC, and packing teams a common reference and reduces reliance on memory or visual assumptions.
Should yarn quantity be checked before packing?
Yes. Correct color alone is not enough. The kit should contain the yarn quantity established for the approved project specification.
Should crochet hook size be part of QC?
Yes. The hook should match the approved yarn and pattern specification. Similar-looking hook sizes should not be treated as interchangeable.
How should small crochet kit accessories be controlled?
Small accessories can be counted individually or organized into predefined sub-packs. The contents of those sub-packs should still be checked against the BOM.
Do printed instructions need quality control?
Yes. Verify the correct SKU, version, language, page completeness, legibility, and consistency with the physical kit contents.
Should QR codes be checked before retail packing?
If a kit relies on a QR code or digital tutorial, it should be tested as a functional component, not treated only as printed artwork.
When should final kit completeness be checked?
A final completeness check should occur before the retail package is sealed. Earlier component-level and assembly-stage controls can reduce the number of problems reaching this point.
Final Takeaway
The last step before retail packing should not be:
"Does the box look complete?"
It should be:
"Does this exact SKU contain every approved component, in the correct specification and quantity, and does everything work together?"
That distinction matters.
A crochet kit is only as usable as its least-controlled component. The yarn, hook, accessories, instructions, tutorial information, and packaging all contribute to the customer's ability to complete the project.
For buyers, the strongest control system therefore combines:
Approved BOM → Reference Kit → Component QC → Controlled Assembly → Cross-Check → Final Completeness Inspection → Retail Packing
When those steps are established before mass packing begins, quality control becomes less dependent on catching mistakes at the end and more focused on preventing them throughout the process.
For brands developing private-label or custom crochet kits, UMY can support the transition from product concept and component planning through sampling, production coordination, QC, and retail packing preparation.
 Chinese